DIY Embossed Velvet Table Numbers with Metal Stand
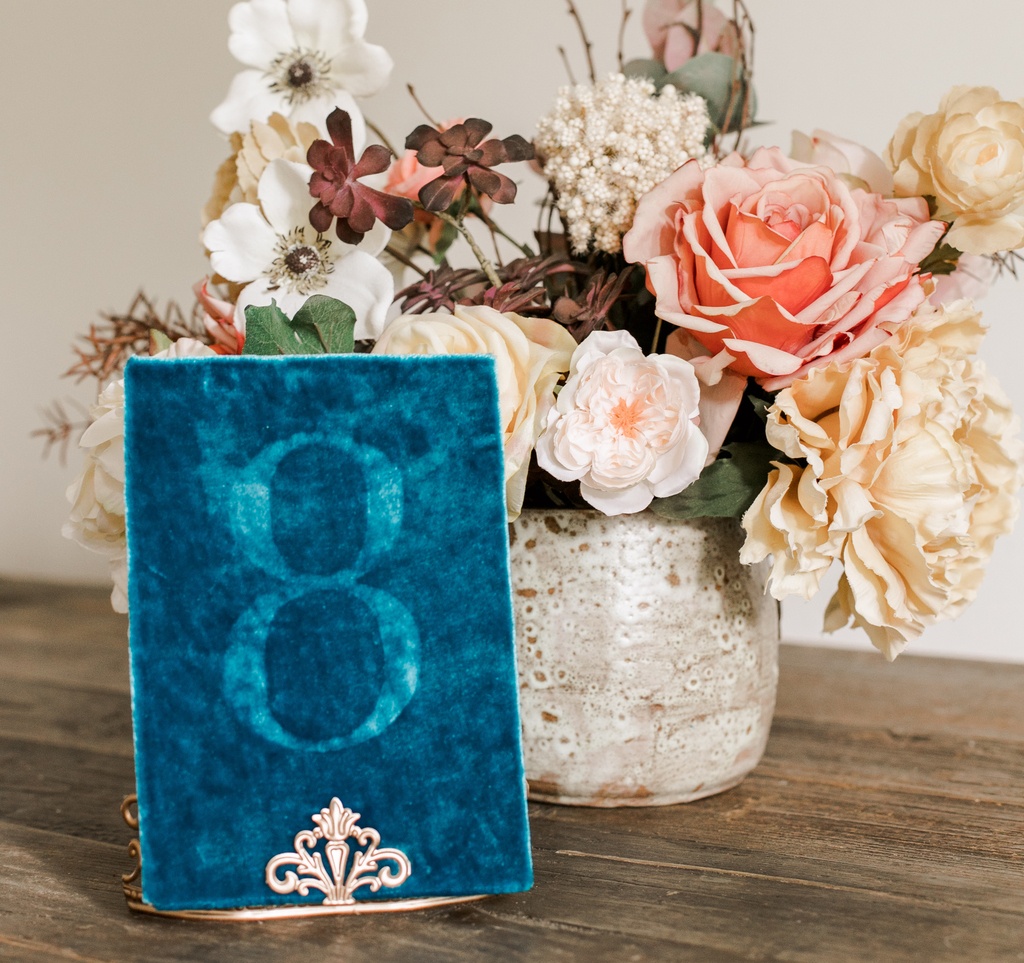
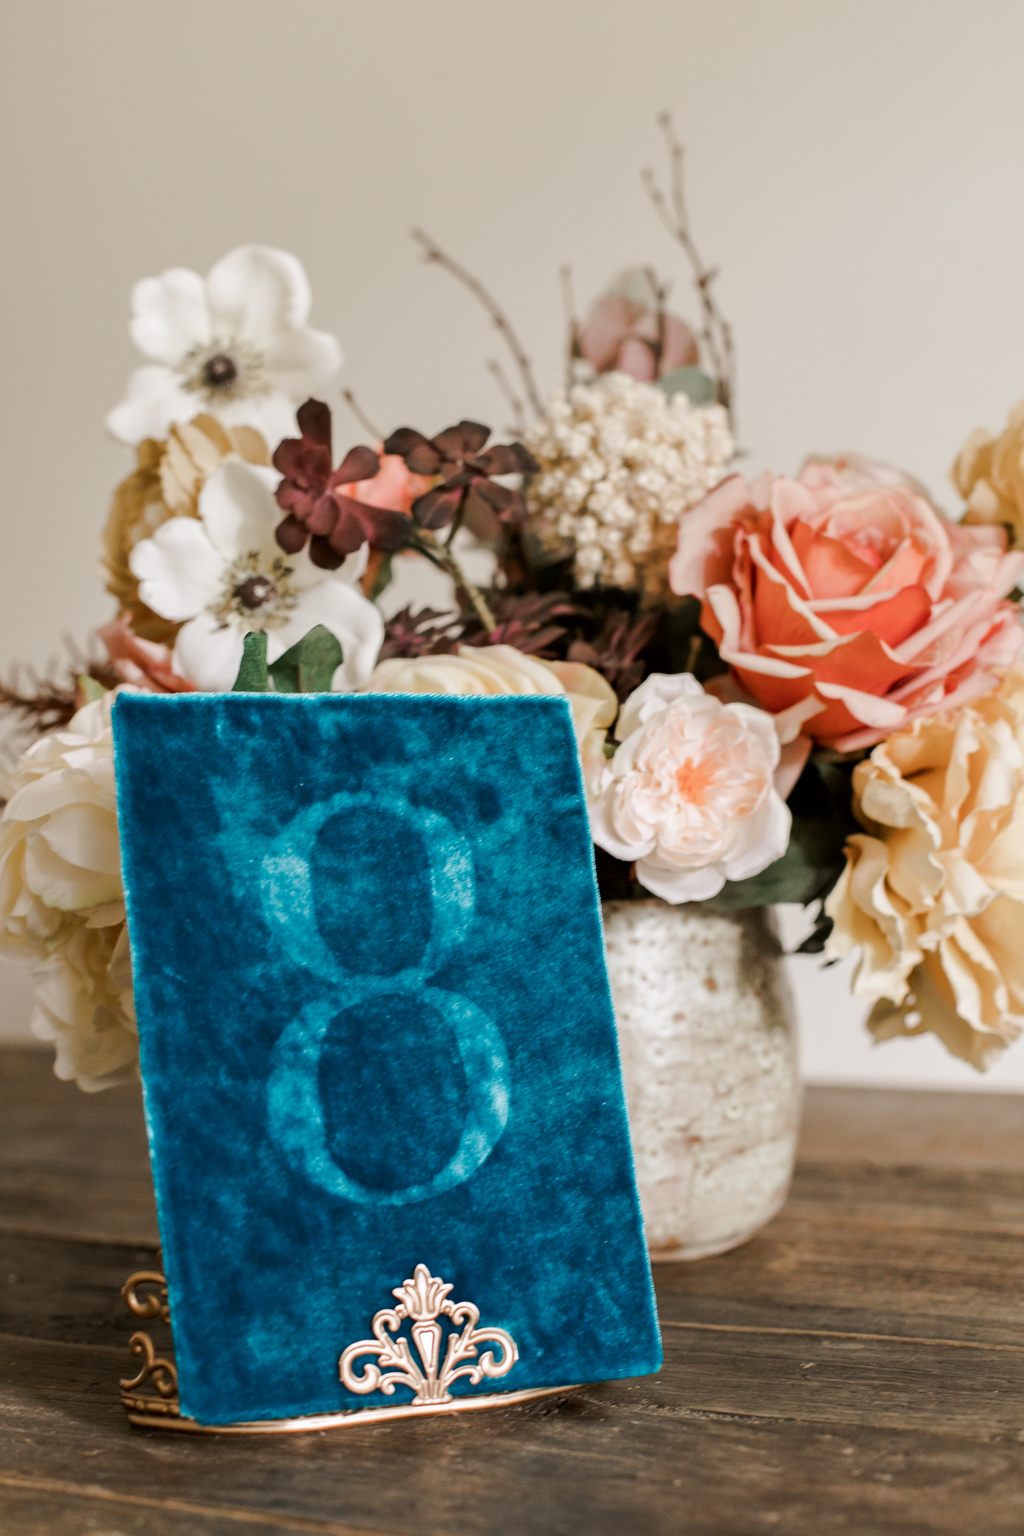
It’s the smallest details that bring a whole look together. We love the look of embossed velvet and today we’re going to dish on how to make these DIY velvet table numbers. Bonus: we’re also going to show how to make the prettiest metal photo stands! The intricate metal design has such a great heirloom feel that looks like a vintage find, right? Fiskars‘s new line of DIY tools are a no-brainer when it comes to projects like this!

Fiskars PowerCut™ Easy Action™ Snips
Fiskars Amplify Mixed Media Scissors
Foam sheets
Silk velvet fabric
Spray bottle
Spray adhesive
Iron
Tinfoil
Cardboard scraps
Chipboard sheets 5×7
Metal trim lace
How to Emboss Velvet for DIY Table Numbers

The best type of velvet to emboss is a silk blend velvet in a dark color to really see the embossed design. I found that spraying water on the fabric (plush side) makes embossing a little easier and faster.
I printed my table numbers using a serif font I liked and cut them on thin foam sheets using my Amplify Mixed Media Scissors. These heavy-duty scissors are my go-to whenever I’m cutting thicker materials and it will also cut through cardstock, magnet, chipboard and more. It is a must-have in your toolbox if you often find yourself trying to cut multiple sheets of paper at once or have projects like this one that requires a more versatile pair of scissors that will still give you a smooth cut every time.

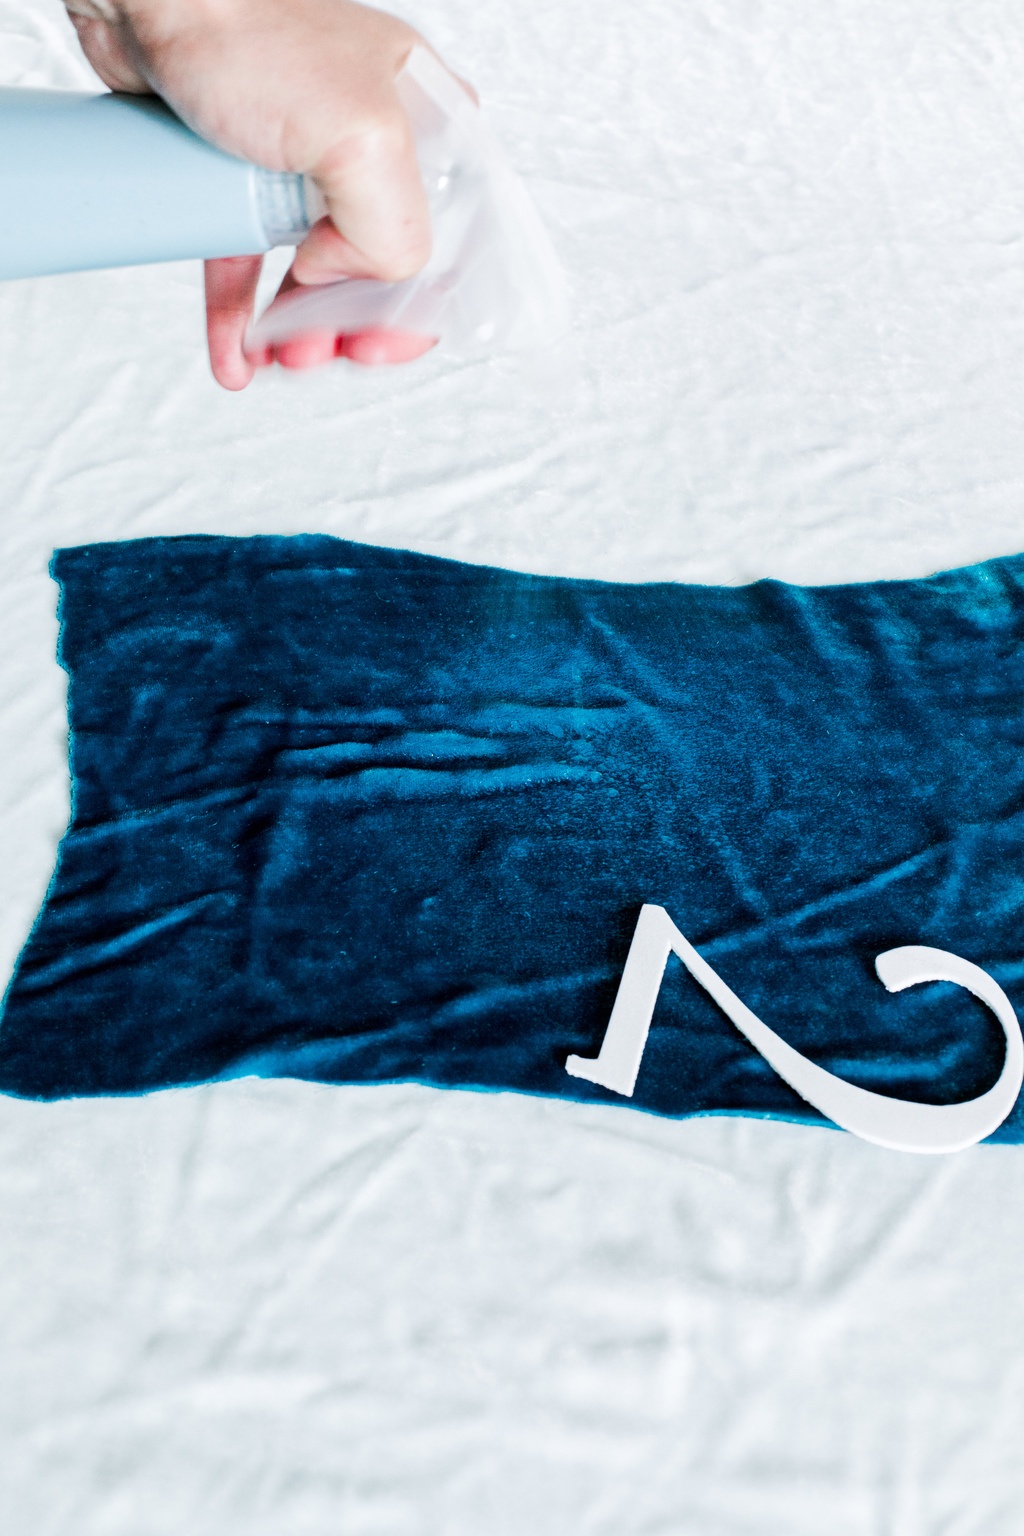


Place your fabric right side up, lightly spray the area with water, place your foam stamp (right side up as well), and place the tinfoil on top. With your hot iron, gently press against the stamp by constantly moving the iron to avoid “embossing” the fabric with the shape of the hot plate! I found this way the easiest to place the stamp exactly where you need it to be, but you can also try reversing the order with stamp upside down, then fabric upside down, and tinfoil.
With the tinfoil protecting the stamp, you can reuse the same foam shape a few times as well!
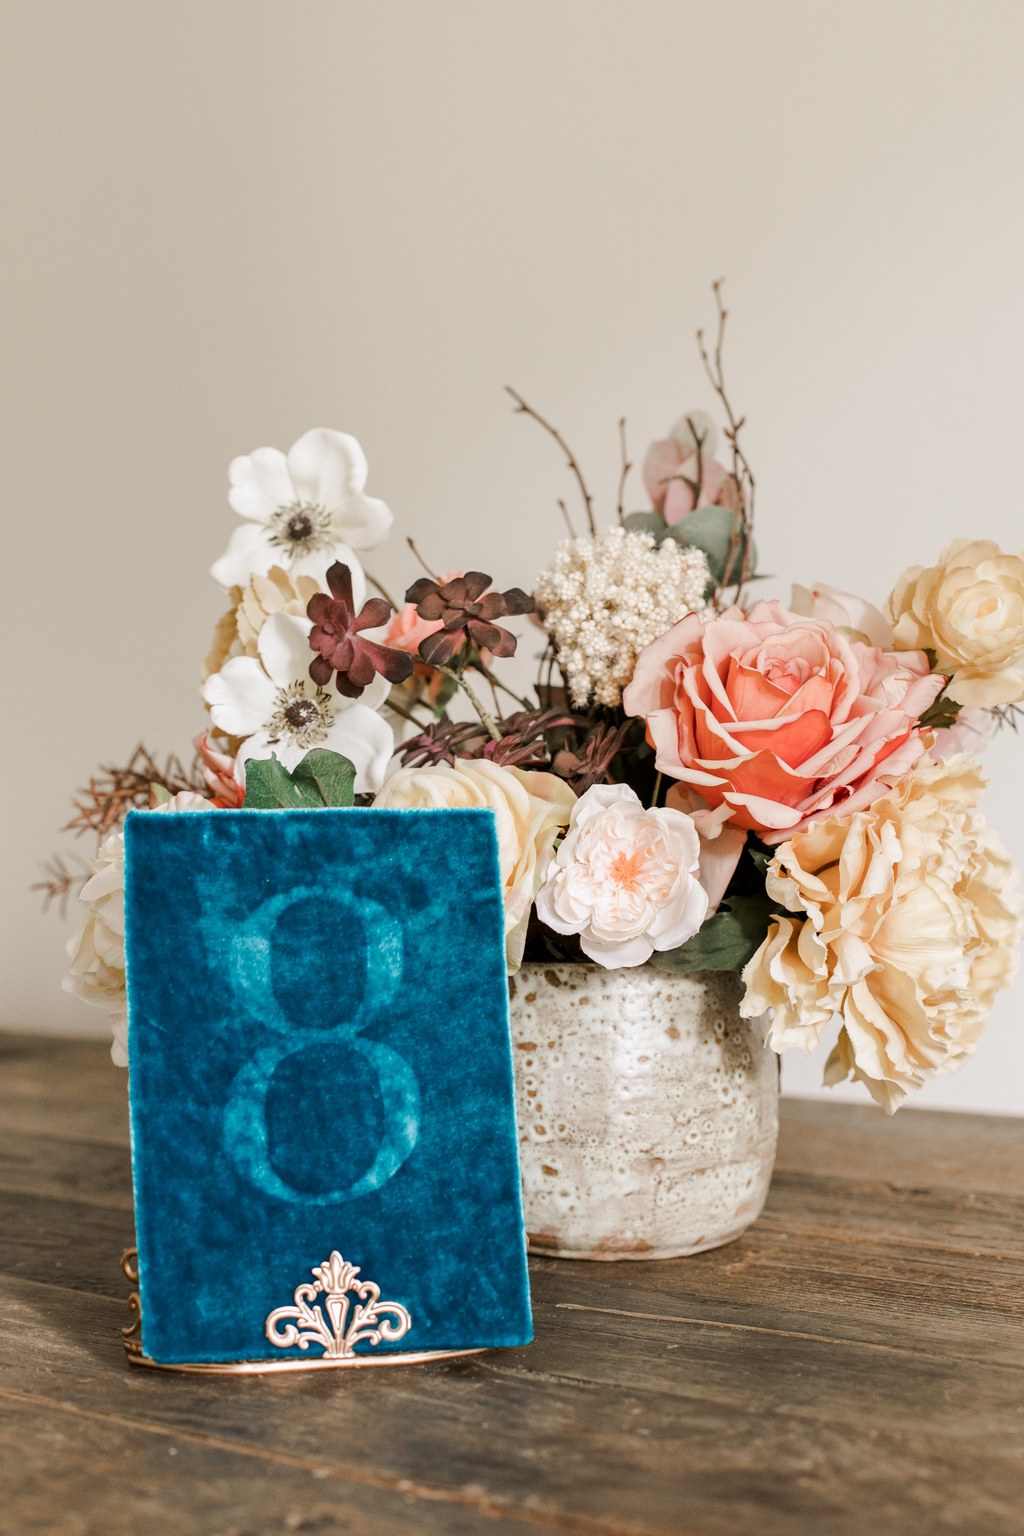
Once your velvet squares are embossed, cut a piece of cardboard to desired size (mine were 5×7 inches) and spray a light coat of adhesive or tacky glue. Tuck fabric ends on the back and light spray the back with adhevisve with a sheet of bindboard on top to hide the fabric edges.
How to Make Embellished Metal Table Number Holders
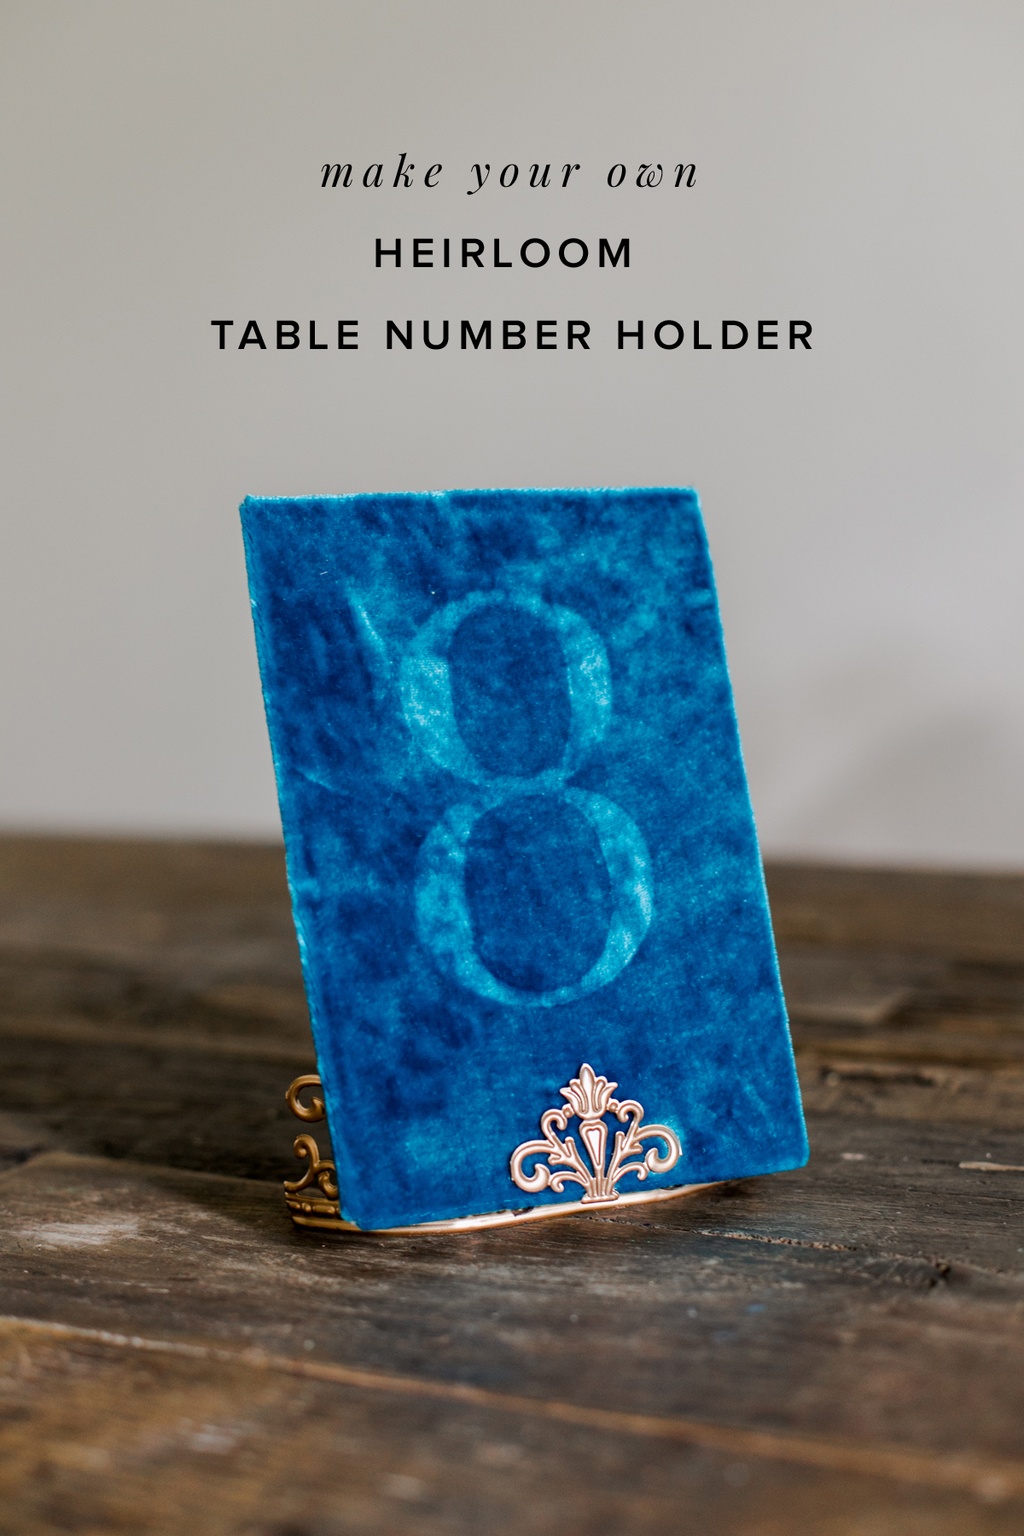
These antique-like metal stands are hands down the easiest and likely the quickest project we have ever done! Using metal banding, often found in lamp part stores or also called metal lace, you can make multiple metal photo stands (or table number holders or menu stands) with just a few feet worth of material.


Fiskars recently launched a collection of DIY Tools, and their
PowerCut™ Easy Action™ Snips came in handy like a champ for this project! It’s small and easy to use, more like scissors than the large and heavy tin snips you might find in a hardware store, which gives you the ability to cut delicate metal sheets with precision and without the denting the metal. It cuts other thick challenging materials too, like chipboard (so you can use the same tool to cut these to size for this project!) and cork and others. It also has built in wire cutter snips up to 12 gauge wire!
All you need to cut for this metal trim are segments of 3 motifs, cutting each end of the middle motif to bend it forward. You’ll create a L shape with center motift as this is what will hold a photo, table number or menu sitting against the back easel support.


Looking for more projects for a crafternoon? Check out these DIY projects to complete your table decor:
DIY Copper Wrap Vases
DIY Woodsy Bouquet
DIY Leather Vase Sleeve
DIY Tile Letter Signage
You can make these metal stands for menus and photos too. Get yourself a Fiskars PowerCut™ Easy Action™ Snips to whip up a few of these pretty stands!