DIY Wood Frame Favors
We’re not done with our woodburning tool just yet! These seating frames that Anniemade created for us is such a good twofer. It can be used as a seating card and guests can take them home as favors made just for them. Or using the same template, you can use it as a “Will You Be My Bridesmaid” gift. Annie will take it from here:

From Annie: We’ve all seen those inexpensive square wood frames at our local crafts stores. These beauties, with their attractive price tags and ready availability, are primed and ready for not one – but TWO, great Wedding DIYs.
With the same set of supplies, we’ll show you how to use a wood-burning pen to create some really unique and reusable pieces of wedding greatness.
Here’s what you need:
– Wood Picture Frames (ours are Square Frames with a 3.7 x 3.7” opening from Michael’s, often found in the dollar bin)
– Wood Burning Pen (ours is from here)
– Graphite Transfer Paper (ours is from here)
– Pencil with eraser
– Painter’s Tape
– Paper
– Cardstock for table numbers
– Scissors
– Ruffled Editable PDF Template
– Printable table numbers


The First Way:
The Frames as Escort Cards with Table Assignments…
Step 1: Set up and print your templates
Leveraging Ruffled’s template PDF, fill out the file with the names of all your guests. Then, customize the Table Assignment squares with your own Table Numbers/Names.
When ready, print the frame templates with the names on regular computer paper (you’ll only use it for tracing). Then print the table assignment squares on regular paper or for a more finished look, on white cardstock.
Cut out the table assignment squares to fit in the middle of your frame and set aside til the end of the project.

Step 2: Transfer your name designs to the frames
Use a scissors to cut the frame with guest name template out so that it’s the size of your actual frame. Tape it to the top of the frame with painter’s tape.
Follow by sandwiching a piece of graphite paper (paper that’s basically a giant colored pencil), graphite side touching the frame, between the template and the frame itself.
Press down firmly with a pencil and trace the printed name design. When finished, you should be able to lift the paper and the graphite paper and see your design left behind- ready to trace with the wood-burning pen.

Step 3: Burn the Frame
With this font, we used an angled flat tip on the wood-burning pen. Plug it in and allow it to heat for 4-5 minutes before using. We also recommend wrapping the pen in a small towel to make it easier/less hot to hold as you “write.”
Set the pen to the design you transferred onto the wood. Embrace the angles and any straight lines you’re able to make as you press the hot tip to the wood.
Note: The longer you hold the pen in one place, the darker the burn will be and these frames burn quickly since the wood is soft. It’s a great idea to practice on a scrap piece of the same wood or the back of the frame- just to get a feel for how to move the pen. Other than the time factor, it’s basically as simple as using an angled brush pen.


Step 4: The Finishing Touches
Glide your hands over the wood-burned design to gently remove any remaining graphite. You could use an eraser, but we found that rubbing gently with our hands was enough to remove anything and not leave any eraser residue.
Now you’re all set – all you need to do is pop in the appropriate table number in the frame for each guests and set them out on a table. Your guests will love all the thought you put into their escort cards and enjoy taking them home as a special favor too.


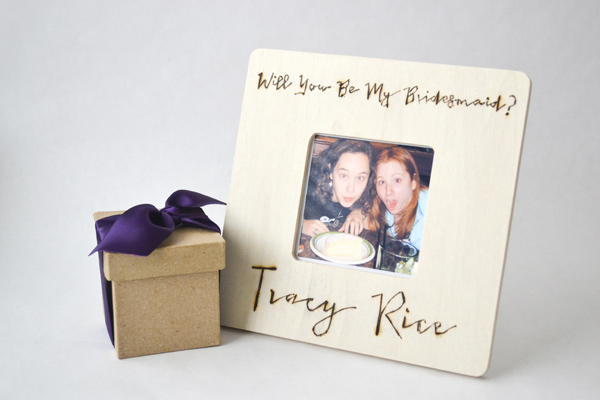
The Second Way: the frames as Bridesmaid Gifts or Bridesmaid Ask Keepsakes

Repeat the process as you would above, but instead leverage our PDF template for making the frames as Bridesmaid gifts.
Rather than printing table assignments, fill the center with a favorite instagram photo of you and your bridesmaid printed on photo paper.
You can give this as a final wedding party gift by just adding your bridesmaid’s name to the bottom. Or, you can use the second part of the PDF to add “Will You Be My Bridesmaid?” to the top of the frame, wood-burned as you would the name, to create a special way to ask your girls to be a part of your big day.
However you do it, you’ll never look at those basic frames in the craft aisle the same way again!
View all step-by-step images
Follow our DIY Project board on Pinterest for more!
I love this DIY project. Nice work..!!!
This is a great DIY project! Perfect for the office setting as well.